Similans just gets better !
Kath joined the boat mid afternoon to meet Tim and Donna, repeat customers since 1999, and Amit who had just completed the South trip. The remaining nine customers were brought to Scuba Adventure by John Stanley who was the Dive Master for the trip. It was great to have an international group with people from Germany, Switzerland, India, America, UK, Australia and China.
With the briefings completed, cabins allocated and equipment prepared it was time to chill out and enjoy the overnight cruise to the Similans.
The first morning brought a surprise! Jack, our engineer called Kath to the dive deck where we had an unexpected guest, a banded sea snake!! Customers grabbed their cameras and then it was gently persuaded to leave the boat.
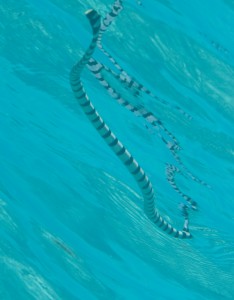
Banded Sea Snake – Louise Murray
The first dive of the morning, the check dive, was on Anita’s Reef. Lovely easy dive going with the current toward the boulders. With everyone comfortable we then headed to Koh Bon. John and his group of Advanced Open Water students were dropped in the bay together with Tim and Donna while the others were dropped on the ridge. The wall area approaching the ridge was covered in glass fish, so much so that it was difficult to see the reef. Two Giant Moray Eels were out in the open fighting. As they tried to bite each other their bodies became intertwined.
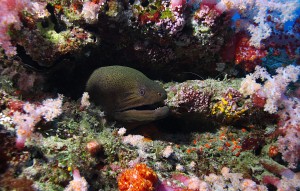
Moray Eel – Phil Lineker
This dual lasted for several minutes before on retreated in defeat. Unfortunately, we didn’t see any mantas, but around the reef had so much activity. John’s group was lucky enough to see two Napolean Wrasses. Third dive and Koh Tachai Pinnacle. Thankfully there was very little current. The Pinnacle was prolific with marine life as always. One thing that was unusual was a tight group of Silver Jack spiralling towards the surface. It was a tornedo of fish!!!! The advanced students were to get an extra navigation dive on the reef as part of their course. The forth dive was to be a night dive on Koh Tachai Reef. Some were apprehensive as they had never been on a night dive before, but this was short lived once they started diving. The highlight of the night dive was an octopus that we were able to watch for a while. These are incredible creatures that have the capability to change not only colour but texture.
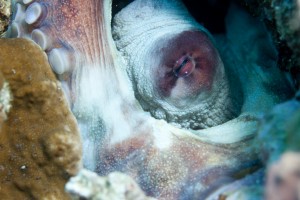
Octopus – Cedric Saveuse
Day 2 and an early start with the engines firing up at 4.30am. Our destination Richelieu Rock. The visibility here was awesome. During the two dives we saw a host of things including a Seahorse, various shrimps, tomato clownfish, bent stick pipefish, cleaner pipefish, cuttlefish, the list is endless. Our eyes were constantly scanning as the previous day there had been 3 whale sharks spotted on the Rock, but unfortunately we were not blessed. As we wanted to maximise the chance of seeing Manta Rays and Whale Sharks we headed back to Koh Tachai where we had two action packed dives with hunting predators, Napoleon Wrass’, Red Tooth Trigger fish dancing like confetti.
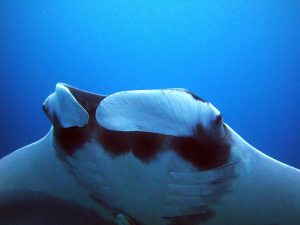
Manta
Day 3 brought an early start on Koh Bon. The ridge still covered in glassfish was action packed as they were being hunted relentlessly by the larger fish on the reef. It is an impressive to sight to see the bait ball swirling in all directions to avoid being caught. Towards the end of the dive on the ridge the first Manta Ray made its appearance. It slowly past the ridge and headed out into deeper water. Kath saw it as she was on her safety stop so a decision to stay for one more dive was made as not everyone had had the opportunity to see it. We were dropped on the north part of the reef and we headed towards the ridge. As you can imagine the second dive was filled with excitement with the possibility of seeing this majestic creature. We unfortunately didn’t see it, but we still had a great dive. As we came on the boat the crew were quick to tell us that they had seen the manta from the boat shortly after we had jumped. At this time there were more boats on the dive site, so a group decision was made to move to the Similans.
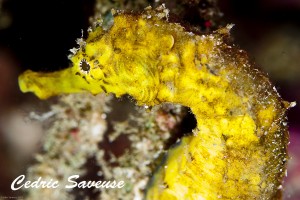
Sea Horse – Cedric Saveuse
Dive 3 was on Three Trees on Island 9. Kath drew her map with the marine life they were likely to see on the reef and then the customers played the guessing game trying to identify them. (Maybe she should take some drawing lessons!!!) We crossed the sand to the outer boulders, which is a very scenic part. Here Paul spotted 3 Seahorses sat in a fan. A lovely bonus!! There was a nice gentle drift on the sloping reef, so with no effort we watched the countless fish as we passed by. Our final dive of the day was West of Eden on Island 7. This site has some very beautiful hard and soft corals and it is like diving in an aquarium. However, there were two major highlights to this dive. In the shallow area we could not believe our eyes when we saw what could only be described as a swarm of parrot and surgeon fish. There were hundreds all tightly packed. We hovered and watched them for quite a while and then they peeled off in a line and swam further along the reef.
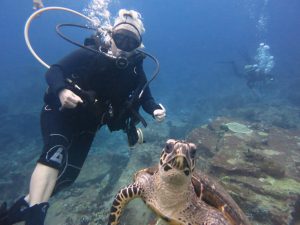
Kath and the Turtle
Then came the ultimate turtle experience. On seeing the divers he stopped eating and came to investigate. This curious turtle was so relentless in it’s approach to the divers, especially Susan, that it had to be gently pushed away several times. Customers managed to get some great photos.
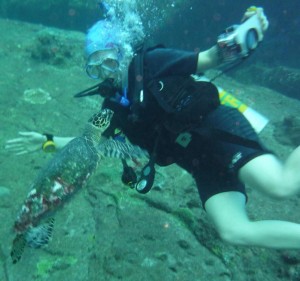
Susan and the Turtle
Day 4 and a decision had been made the previous night by the customers that the early morning dive should be on West of Eden again as there was so much to see. So, at 6.45 we went for our dive. The reef was just waking up and we were witness to some great hunting action around the stunning coral blocks. There was a current, so instead of turning around at the corner we continued around the Island where there were some schools of Rainbow Runners in the deep together with some large Tuna cruising by. Our final dive of the trip was Shark Fin Reef. This is the furthest south we can dive in the Similan Islands. This reef is known for the stunning topography of the huge granite boulders that stretch for about a kilometre. It is constantly adorned by neon blue fusiliers that run like a train along the reef. Our main highlight of this dive was seeing a shark…not just a shark….one that Kath had never seen in the Similans Islands. It swam straight through the group. Amit had video footage of it, so we were able to identify the shark as a Silver Tip.
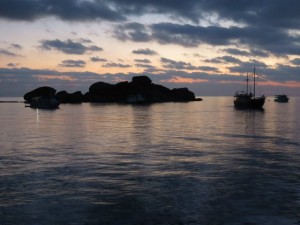
The Similans
This trip was a very social trip with customers even conducting dive briefings. Although, only a few of us saw the Manta everyone was more than happy with the diving. We had such diverse marine life and behaviour that this trip will be remembered by all. Michael, Cindie and Ron decided to book for the next trip south to Hin Daeng and Hin Muang. Under the guidance and Instruction of John, Cindie, Ron and Xin completed their Advanced Open Water. Xin also completed her Digital Underwater Photography and Peak Performance Buoyancy Specialities. Congratulations to them all!


Scubacat Community